Blog
SPRING GARDENING GUIDE – PART 1
We all love a great and vibrant garden where nothing can beat the sense of achievement when the hard preparation and maintenance is rewarded with a colourful garden which is praised by family and friends alike. This Blog will help you to gain insight on how to get your garden fully prepared for the season ahead.
GET YOUR TOOLS IN ORDER
As simple as it sounds, getting your tools ready and prepared is an imperative element and a factor in which many of us forget to do. It is a fantastic opportunity to go over all your tools and assess the condition of them and evaluate if new ones need to be purchased. Sharpening blades and oiling hinges are two simple methods that can help bring your tools back to working condition, giving them a new lease of life.
It is amazing to find how much easier it is to cut and dig with well sharpened and oiled tools, a factor which would help to make the whole Spring season so much easier! If you find that you need to purchase new tools, then do not fear as here at Polhill we have a diverse selection to help with all your gardening needs.
CLEAR OUT WEEDS AND THE WINTER DEBRIS
Do that spring clean! This can be laborious and very time consuming but will make your life so much easier when working on your garden. Adding to the fact that it is extremely rewarding to get rid of all the mulchy mess. The main aim is to get everything back to bare soil. Well-composted mulch and/or organic matter can be incorporated into the soil, but fresh mulch needs to be raked away so that the soil is fully exposed.
The biggest concern is that of weeds which may still be alive which are laying in the garden. These must be removed from the soil and ideally burned or placed in a compost pile where heat will kill it before any seeds can germinate. It is imperative to make sure that weeds are disposed of sufficiently as you do not want any living weeds around, as they will try to compete with and destroy your garden plants.
PRUNING
Many trees and shrubs can do with a good prune this time of year. Late winter/early spring is the perfect time to prune back old branches as they can now be seen properly. It also presents the perfect opportunity to start shaping your plants.
Some plants that you can start pruning this time of year are:
- Buddleia
- Lonicera
- Hydrangea paniculata
- Cercis
- And Wisteria to name a few
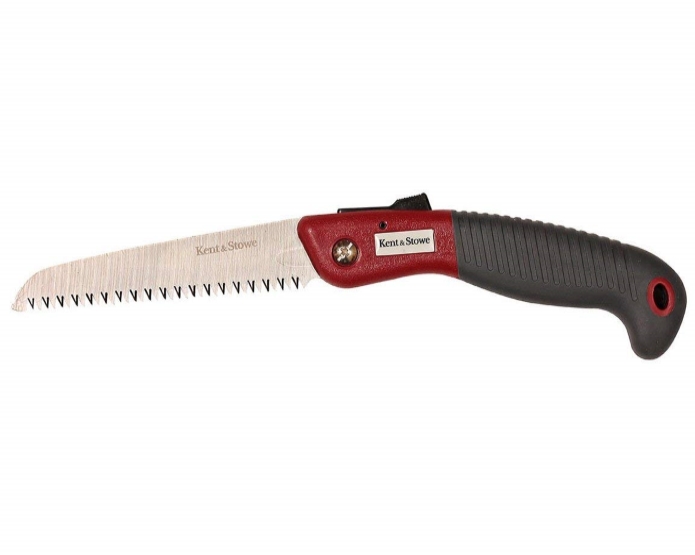
It is also the perfect time of year to start pruning your apple or pear trees, removing all of the old wood in order to stimulate the new wood. In order to make the job easier, it is wise to invest in a pair of secateurs and good quality pruning saw, both of which are available to purchase here at Polhill Garden Centre.
However, it is important that before you set yourself loose snipping your plants, you should make sure that your tools have been cleaned properly. This precaution keeps you from inadvertently spreading plant disease around your garden! A great tip to consider is that when you prune your plants, it’s great practice to add some fertiliser to the soil to ensure that your plants receive that nutrients that they require.
PREPARE THE SOIL
Once the frost has been lifted, the soil is ready to be worked on. Now is the perfect time to start turning over raised beds. The winter months tend to compact the soil, so you would want to loosen it up by turning it. Once the soil has been loosened and starting to look fresh again, composts can be added to ensure that the soil receives all the nutrients in which it requires.
SHRUB REMOVAL
Due to there being significantly less frost in the spring season, shrubs are another element which can be tackled and removed. The mini guide below should help to make you feel more confident with carrying out the project in hand.
-
De-branching:
Use your reciprocating saw to cut away the branches of the plant. While it may be tempting to go right for the base of the plant, it’s better to start with the outer layers and work your way in. Continue with the cutting process until there is just a few inches of stems poking through the ground. It is useful to keep a bin or large bag near you so that the cuttings can be disposed of.
-
De-rooting:
Grab that shovel! Begin digging up the soil around the plant stump. You want to continue digging until you expose the roots of the plants. A trowel can be exceptionally useful to clear away as much excess soil around the plant. Using either a handsaw or a reciprocating saw, you want to cut all the way through the root. Carry on cutting around the plant stump until you think you have sliced through all the branches.
-
Removing the stump:
Grab that shovel again! And place it underneath the plant stump and push down on the handle to pry the stump loose from the dirt. Once the stump has been freed from the ground, shovel the soil into the hole.
-
Recycle your cuttings:
It is always a great idea to recycle all the cuttings which have been made. Here at Polhill, recycling is a very important to us and we encourage it greatly. For example, did you know that we produce our very own kindling through recycling our old and unwanted pallets.
-
Make yourself a well earned tea:
Most of the strenuous work has now been completed, well done! Put that kettle on, sit back and relax whilst admiring the hard work you have put in.
We hope that Part 1 of this guide has supplied some interesting and useful information which would assist you when prepping your garden for Spring.
Be sure to check back next week when Part 2 of this guide will be available on our website, delving into how your lawn should be treated over the next few months.


Leave a reply
You must be logged in to post a comment.